
GLAIR Vision Prebuilt Web Pages
Prebuilt Web Pages are web pages hosted at GLAIR Vision. You can use our prebuilt web pages to help you integrate our services with minimal code. Using our prebuilt web pages will save you time as you don't need to develop your own. Under the hood, our prebuilt web pages are using GLAIR Vision API.
Currently we provide three prebuilt pages:
Before you get started, make sure you have already obtained API Key, username, and password. See Authentication for more details.
Passive Liveness
- Create a Passive Liveness session to obtain a session URL.
- Specify
success_urlso GLAIR can redirect your user back to your website. - Optionally, you can specify
cancel_url. If set, GLAIR will show a back button and your user will be directed to this URL when the button is clicked. - After creating the session, redirect your user to the session URL.
Create Passive Liveness Session and Redirect
    1
2
3
4
5
6
7
8
9
10
11
12
13
14
15
16
17
18
19
20
21
22
23
24
25
26
27
28
29

    //server.js
import express from 'express';
import { Vision } from '@glair/vision';

const app = express();
const vision = new Vision({
  apiKey: 'api-key',
  username: 'username',
  password: 'password',
});

const YOUR_DOMAIN = 'http://localhost:3000';;

app.post('/pl-session', async (req, res) => {
  const session = await vision.faceBio.passiveLivenessSessions.create({
    success_url: `${YOUR_DOMAIN}?success=true`,
    cancel_url: `${YOUR_DOMAIN}?canceled=true`
  })

  res.redirect(303, session.url)
});

app.get('/pl-result', async (req, res) => {
  const sid = req.query.sid
  const result = await vision.faceBio.passiveLivenessSessions.retrieve({sid})
  res.json(result)
});

app.listen(3000, () => console.log('Running on port 3000'));
- Show a page to request consent from your user to perform passive liveness.
- Inside the page, add a button that will redirect your user to GLAIR-hosted passive liveness web page.
- When GLAIR redirects your user to
success_url, GLAIR will appendsidto the query parameter. Use thissidto retrieve the result (line 30).
Show Page with Button to Redirect
    1
2
3
4
5
6
7
8
9
10
11
12
13
14
15
16
17
18
19
20
21
22
23
24
25
26
27
28
29
30
31
32
33
34
35
36
37
38
39
40
41
42
43
44
45
46

    // App.jsx
import { useState, useEffect } from "react";

const PassiveLivenessRequest = () => (
  <div>
    <p>We need to detect your passive liveness to continue</p>
    <form action="/pl-session" method="POST">
      <button type="submit">
        Perform Passive Liveness
      </button>
    </form>
  </div>
);

export default function App() {
  const [message, setMessage] = useState("");

  useEffect(() => {
    async function fetchSessionResult(sid) {
      const data = await fetch(`/pl-result?sid=${sid}`)
      const sessionResult = await response.json()
      switch (sessionResult.status) {
        case "FINISHED":
          setMessage(`Detection finished. Result: ${json.result}`)
          break
        case "PENDING":
        default:
          // This should not happen.
          // Because when the session is still PENDING, ${YOUR_DOMAIN}?success=true should not be called
          // However, if it does happen (user manually typed '?success=true') we do nothing.
          // Then "message" will be empty, and we will show <PassiveLivenessRequest /> component
          break
      }
    }

    const query = new URLSearchParams(window.location.search);
    if (query.get("success")) {
      fetchSessionResult(query.get("sid"));
    }
    if (query.get("canceled")) {
      setMessage("Detection canceled.");
    }
  }, []);

  return message ? <>{message}</> : <PassiveLivenessRequest />
}
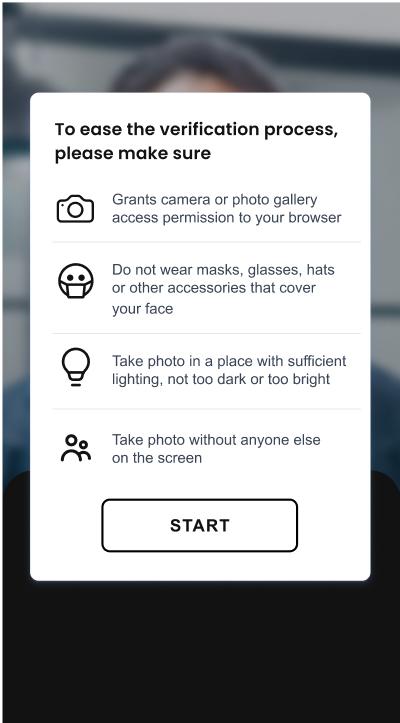
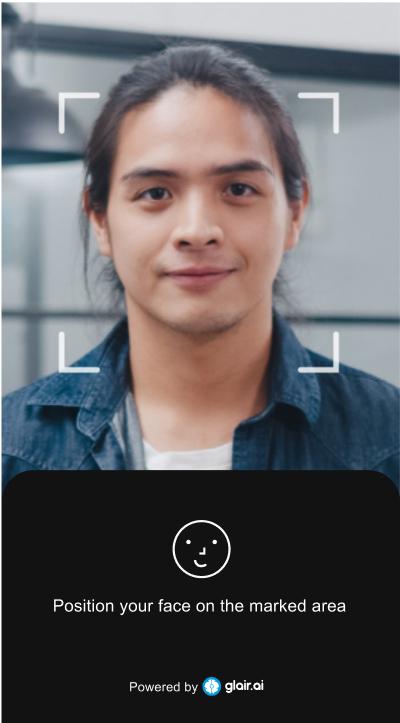
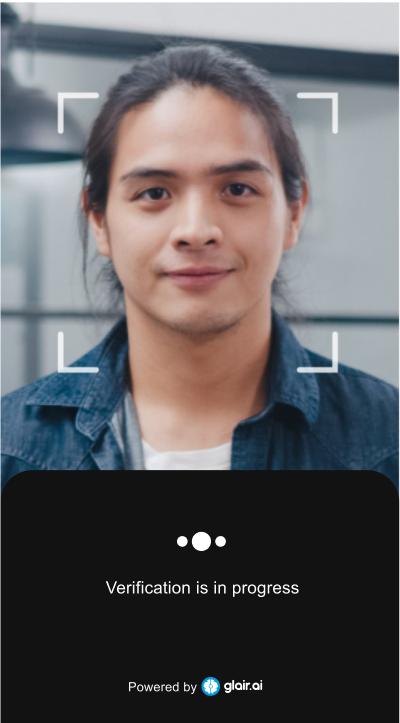
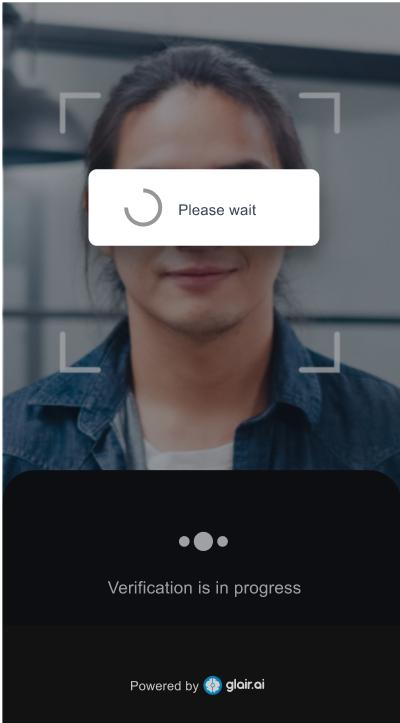
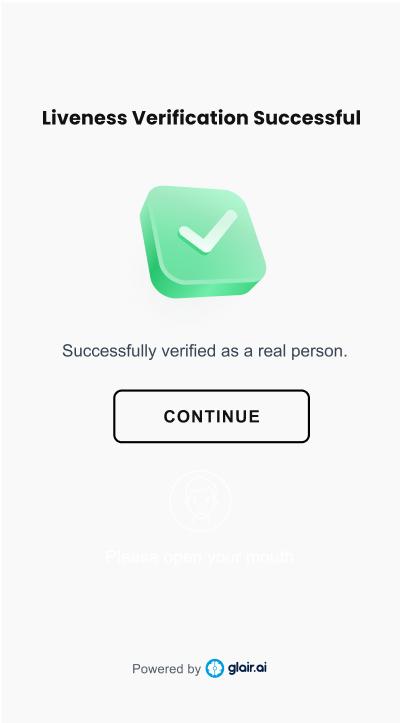
This is the Prebuilt Web Pages for Passive Liveness:

Active Liveness
- Create an Active Liveness session to obtain a session URL.
- Specify
success_urlso GLAIR can redirect your user back to your website. - Optionally, you can specify
cancel_url. If set, GLAIR will show a back button and your user will be directed to this URL when the button is clicked. - After creating the session, redirect your user to the session URL.
- The rest of the steps is similar to Passive Liveness above.
Create Active Liveness Session and Redirect
    1
2
3
4
5
6
7
8
9
10
11
12
13
14
15
16
17
18
19
20
21
22
23
24
25
26
27
28
29
30

    // server.js
import express from 'express';
import { Vision } from '@glair/vision';

const app = express();
const vision = new Vision({
  apiKey: 'api-key',
  username: 'username',
  password: 'password',
});

const YOUR_DOMAIN = 'http://localhost:3000';

app.post('/al-session', async (req, res) => {
  const session = await vision.faceBio.activeLivenessSessions.create({
    number_of_gestures: 2,
    success_url: `${YOUR_DOMAIN}?success=true`,
    cancel_url: `${YOUR_DOMAIN}?canceled=true`
  });

  res.redirect(303, session.url);
});

app.get('/al-result', async (req, res) => {
  const sid = req.query.sid
  const result = await vision.faceBio.activeLivenessSessions.retrieve({sid})
  res.json(result)
});

app.listen(3000, () => console.log('Running on port 3000'));
KTP
- Create a KTP session to obtain a session URL.
Specify
success_urlso GLAIR can redirect your user back to your website.Optionally, you can specify
cancel_url. If set, GLAIR will show a back button and your user will be directed to this URL when the button is clicked.After creating the session, redirect your user to the session URL.
The rest of the steps is similar to Passive Liveness above.
Create KTP Session and Redirect
    1
2
3
4
5
6
7
8
9
10
11
12
13
14
15
16
17
18
19
20
21
22
23
24
25
26
27
28
29

    // server.js
import express from 'express';
import { Vision } from '@glair/vision';

const app = express();
const vision = new Vision({
  apiKey: 'api-key',
  username: 'username',
  password: 'password',
});

const YOUR_DOMAIN = 'http://localhost:3000';

app.post('/ktp-session', async (req, res) => {
  const session = await vision.ocr.ktpSessions.create({
    success_url: `${YOUR_DOMAIN}?success=true`,
    cancel_url: `${YOUR_DOMAIN}?canceled=true`
  });

  res.redirect(303, session.url);
});

app.get('/ktp-result', async (req, res) => {
  const sid = req.query.sid
  const result = await vision.ocr.ktpSessions.retrieve({sid})
  res.json(result)
});

app.listen(3000, () => console.log('Running on port 3000'));
NPWP
- Create a NPWP session to obtain a session URL.
Specify
success_urlso GLAIR can redirect your user back to your website.Optionally, you can specify
cancel_url. If set, GLAIR will show a back button and your user will be directed to this URL when the button is clicked.After creating the session, redirect your user to the session URL.
The rest of the steps is similar to Passive Liveness above.
Create NPWP Session and Redirect
    1
2
3
4
5
6
7
8
9
10
11
12
13
14
15
16
17
18
19
20
21
22
23
24
25
26
27
28
29

    // server.js
import express from 'express';
import { Vision } from '@glair/vision';

const app = express();
const vision = new Vision({
  apiKey: 'api-key',
  username: 'username',
  password: 'password',
});

const YOUR_DOMAIN = 'http://localhost:3000';

app.post('/npwp-session', async (req, res) => {
  const session = await vision.ocr.npwpSessions.create({
    success_url: `${YOUR_DOMAIN}?success=true`,
    cancel_url: `${YOUR_DOMAIN}?canceled=true`
  });

  res.redirect(303, session.url);
});

app.get('/npwp-result', async (req, res) => {
  const sid = req.query.sid
  const result = await vision.ocr.npwpSessions.retrieve({sid})
  res.json(result)
});

app.listen(3000, () => console.log('Running on port 3000'));